Best Photos for an Accurate AI Clothes Try-On
Learn how to take the best photo for AI clothes try-on, including pose, framing, lighting, camera height, background, clothing, and garment-reference tips.
The best photo for an accurate AI clothes try-on is sharp, front-facing, evenly lit, and easy to interpret. Your shoulders, arms, waist, hips, legs, and shoes should be visible whenever the new garment affects them. Stand naturally, keep your arms slightly away from your torso, and use a level camera far enough back to avoid wide-angle distortion.
Photo quality cannot guarantee a perfect generated result, but it removes avoidable uncertainty. Crossed arms hide sleeves and waistlines; bags cover garment boundaries; seated poses change proportions; backlighting removes detail; and a tilted close phone camera can exaggerate one part of the body. A simple source photo gives the tool clearer information to work with.
Quick photo checklist before you upload
- Face forward with your head, shoulders, waist, hips, knees, and feet aligned naturally.
- Keep both arms visible and slightly separated from your torso without striking a rigid pose.
- Use soft daylight or even room light without a bright window directly behind you.
- Position the camera level around waist or chest height and step back instead of using an ultra-wide lens.
- Remove bags, coats, scarves, chairs, furniture, pets, and other people that overlap your outline.
Original poor-photo versus clear-photo examples
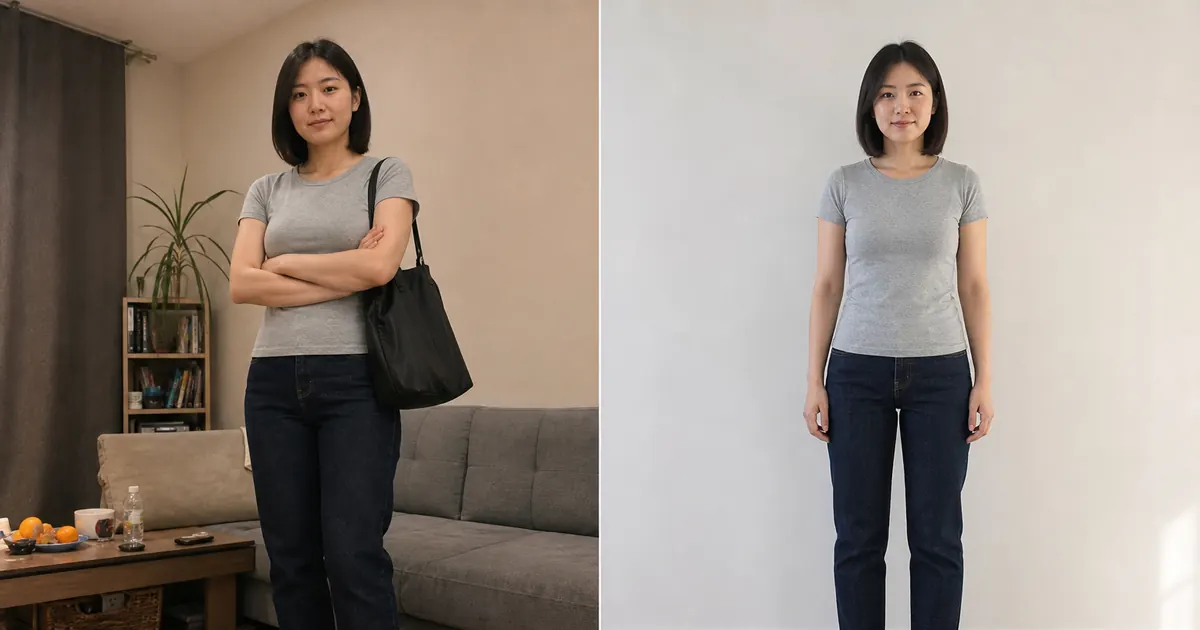
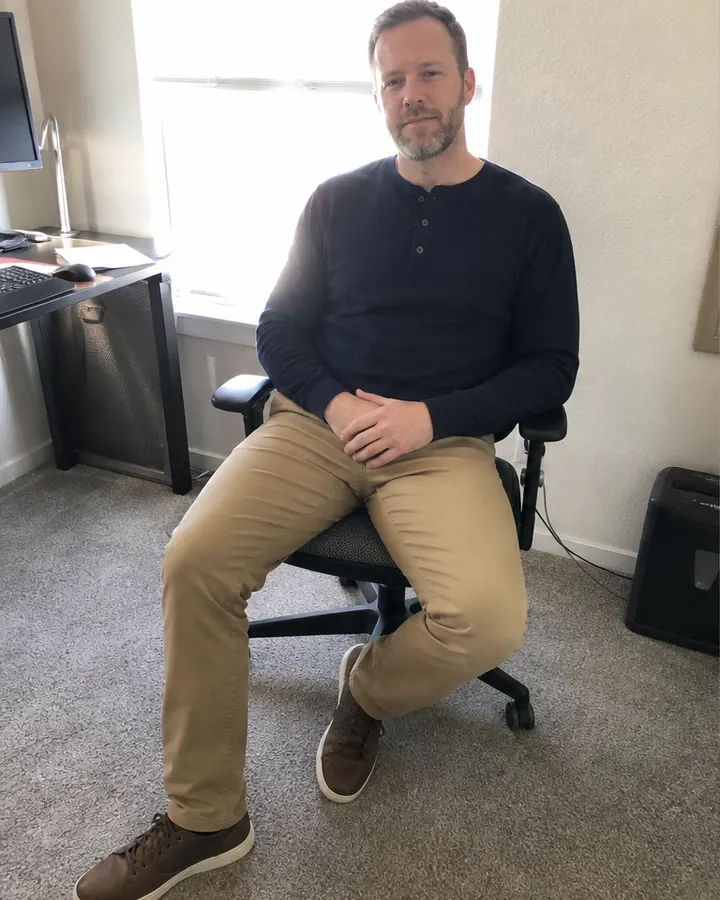
These examples use new fictional models wearing the same clothes on both sides. The first image in each pair intentionally contains common problems; the second improves body visibility, posture, lighting, camera level, crop, and background. Compare the information available to an AI system in each version.
The women's example removes crossed arms and a bag, then simplifies the background and light. The men's example changes a seated, backlit office photo into an evenly lit front-facing standing photo.
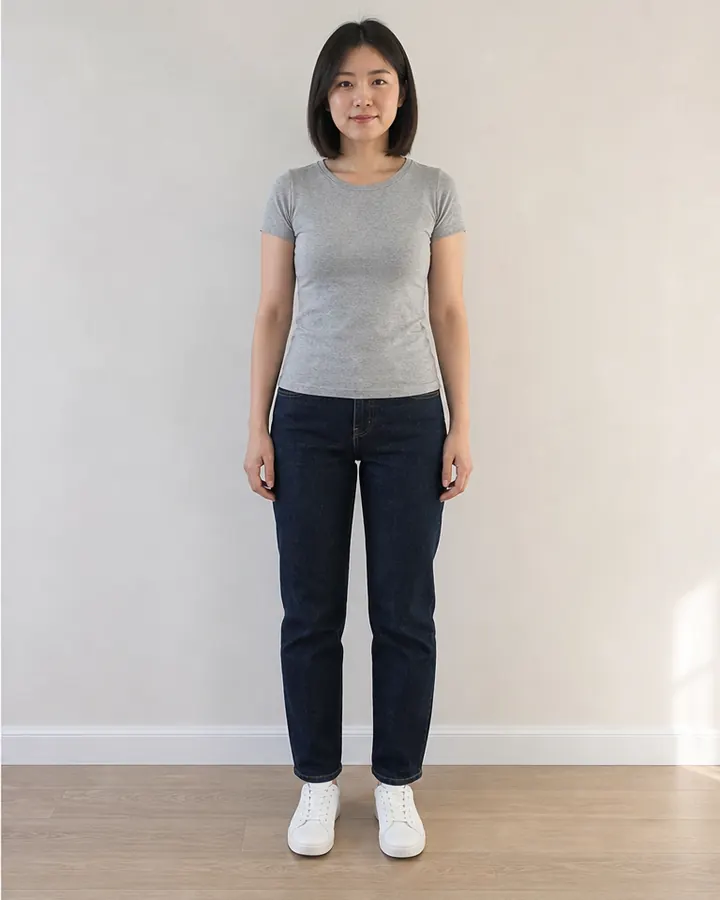
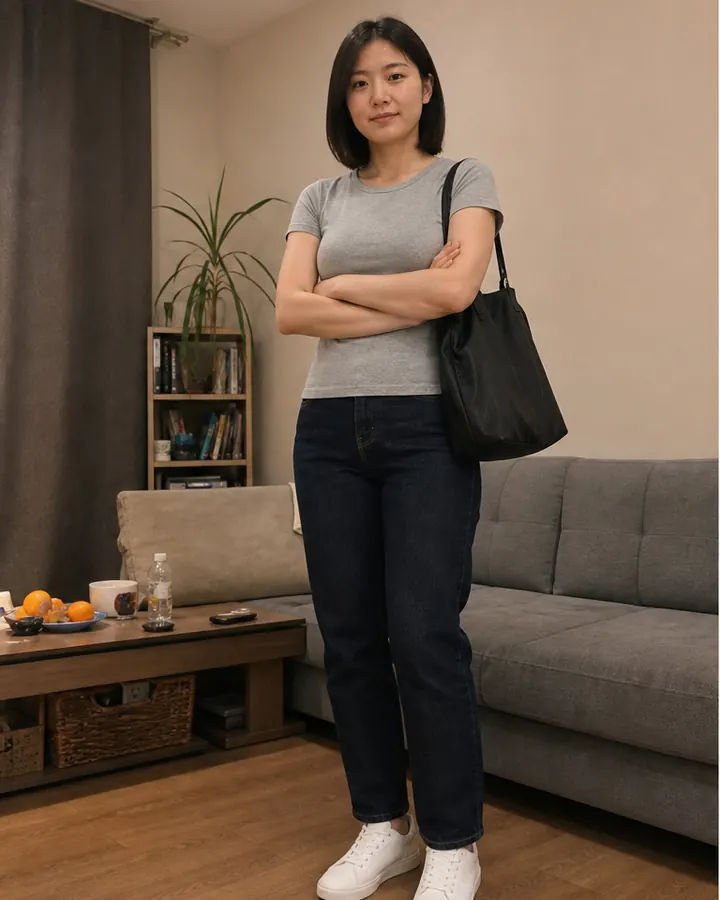 BeforeAfter
Photo preparation · Obstructed photo to clear standing photo
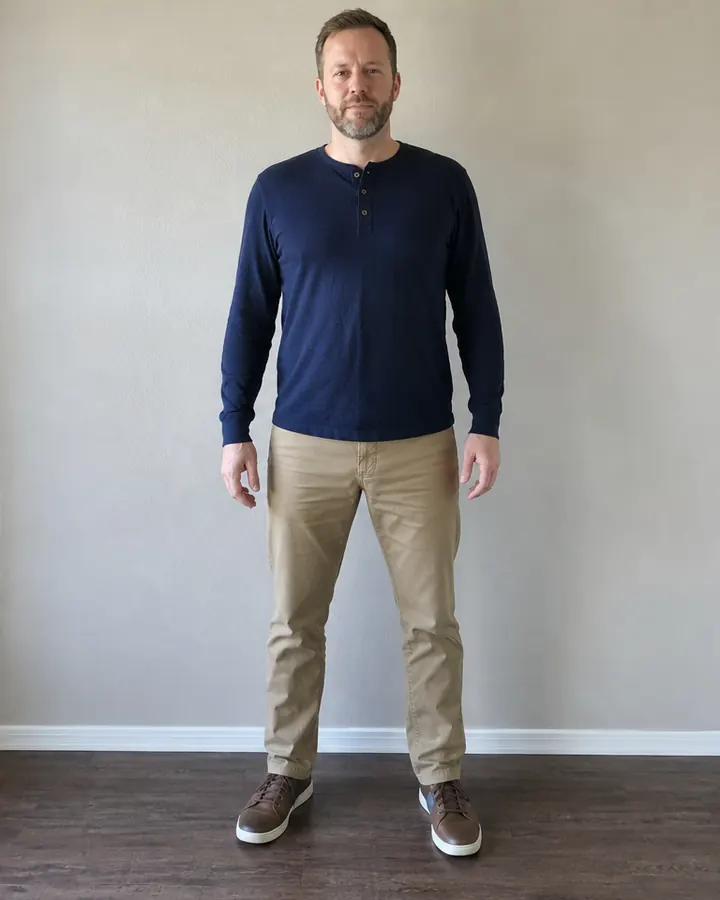
 BeforeAfter
Photo preparation · Seated backlit photo to clear standing photo
Use a relaxed front-facing pose
Stand with weight distributed naturally rather than twisting sharply or pushing one hip far to the side. Leave a small gap between each arm and your torso so sleeve and waist boundaries remain visible. Keep hands relaxed beside the thighs when possible. Avoid crossed arms, hands inside pockets, hands covering the stomach, crossed legs, deep lunges, and poses where hair or accessories cover large parts of the outfit area.
Set the camera height and distance
For a full-body photograph, place the camera roughly around waist or chest height and keep it level. Step backward or use a tripod rather than tilting the phone upward from the floor or downward from above your head. Very close wide-angle photos can enlarge the upper body, feet, or nearest leg. Use the main camera with a timer when possible, and leave modest space around your head and shoes.
Choose even, neutral lighting
Face a large window with indirect daylight or use evenly distributed room lighting. Avoid a bright window behind you, mixed orange and blue lights, harsh direct sun, heavy shadows, colored decorative lighting, and flash reflected in a mirror. Neutral light makes body boundaries and starting clothes clearer and gives clothing-color comparisons a more consistent base.
Wear simple starting clothes
Simple clothes that follow your general outline are easier to interpret than a bulky coat, oversized hoodie, layered scarf, very wide skirt, or flowing robe. You do not need tight clothing, but shoulders, arms, waist, hips, and legs should remain distinguishable. Choose a starting outfit that contrasts with the background and remove large accessories that overlap the garment area.
Frame the photo for the garment you want to test
Include the entire body for dresses, trousers, skirts, suits, coats, and complete outfits. A head-to-hip or head-to-thigh image may be adequate for a shirt, blouse, sweater, or short jacket if sleeves and hem remain visible. When comparing trouser length, dress hem, or shoes, never crop the lower legs or feet. Use the same source photo across options for a fair comparison.
Do not forget the garment reference
Your clothing image matters too. Use a clean, front-facing product photo, flat lay, or mannequin image that shows the complete garment. Important details include neckline, collar, sleeves, cuffs, buttons, zipper, waist, pockets, pattern, and hem. Crop screenshots to remove navigation, prices, promotional labels, and unrelated products, and avoid reference poses that hide half the item.
Check the result before trusting the comparison
- Confirm that your face, height, body proportions, expression, pose, and background remain recognizable.
- Inspect shoulders, sleeves, hands, waist, garment edges, legs, and shoes for distortions.
- Reject duplicated buttons, broken patterns, melted fingers, invented text, or inconsistent hems.
- Repeat important garments and look for details that remain stable across believable generations.
- Use the result for visual comparison, then verify size, material, construction, and returns separately.
Use any Try button on this page to upload your prepared photo to InFashi, or continue with the Android app from the action panel. A clear source photo and clean garment reference make the comparison easier to evaluate, even though the final image remains a visual planning aid rather than a sizing guarantee.
Frequently Asked Questions
- What is the best photo for AI clothes try-on?
- Use a sharp, front-facing photo in even light with your body visible, a level camera around waist or chest height, arms slightly separated, and no bag, coat, furniture, or other person blocking your outline.
- Do I need a full-body photo for virtual try-on?
- Use a full-body photo when testing dresses, trousers, skirts, suits, coats, or complete outfits. A waist-up image may be sufficient for shirts or jackets, but include every area affected by the garment.
- Can I use a mirror selfie for AI clothes try-on?
- It may work, but a timer photo is usually clearer because the phone does not cover your face or torso. If using a mirror, keep it clean, hold the phone away from garment boundaries, avoid flash glare, and keep the camera level.
- What should I wear in the original photo?
- Wear simple, reasonably close-fitting clothes that leave your shoulders, waist, arms, and legs easy to distinguish. Avoid bulky coats, very wide layers, long scarves, bags, and clothing that merges with the background.
- What garment image should I upload?
- Choose a clean front-facing product photo showing the entire garment, including neckline, sleeves, fastenings, waist, pockets, and hem. Crop away menus, prices, text, unrelated products, and obstructing poses.
Try it on InFashi
Upload a photo in your browser, or download the Android app and preview your look on your phone.